Hello! Thank you for adding Typemarker to the list of trusted tools you use in managing your network of WordPress sites. We have yet to write detailed documentation for the plugin, but do want to provide this quick-start guide so you can properly set up your dashboard and your new Pro Report template.
Licensing
You will note that three license keys have been generated with your purchase. The only one you will need at this time is the one associated with Typemarker. The Starter Bundle key and Roti key can be safely ignored. After installing Typemarker as a plugin on your MainWP dashboard, you will be presented with the following prompt…

After entering your Typemarker license key, click Activate License. Once activated, your site will now periodically check for updates to the plugin.
There are a few known issues with license activation. Both MainWP extensions for Sucuri and SEO throw javascript errors that interfere with activation. You will need to temporarily deactivate them while activating the Typemarker license.
Template Installation
The best instructions (at this time) for installing templates can be found here on the MainWP site. Typemarker uses the same template folders mentioned by MainWP. Our templating engine sits alongside MainWP Pro Reports, so installation of our custom templates can be accomplished in the same fashion as they outline in their documentation.
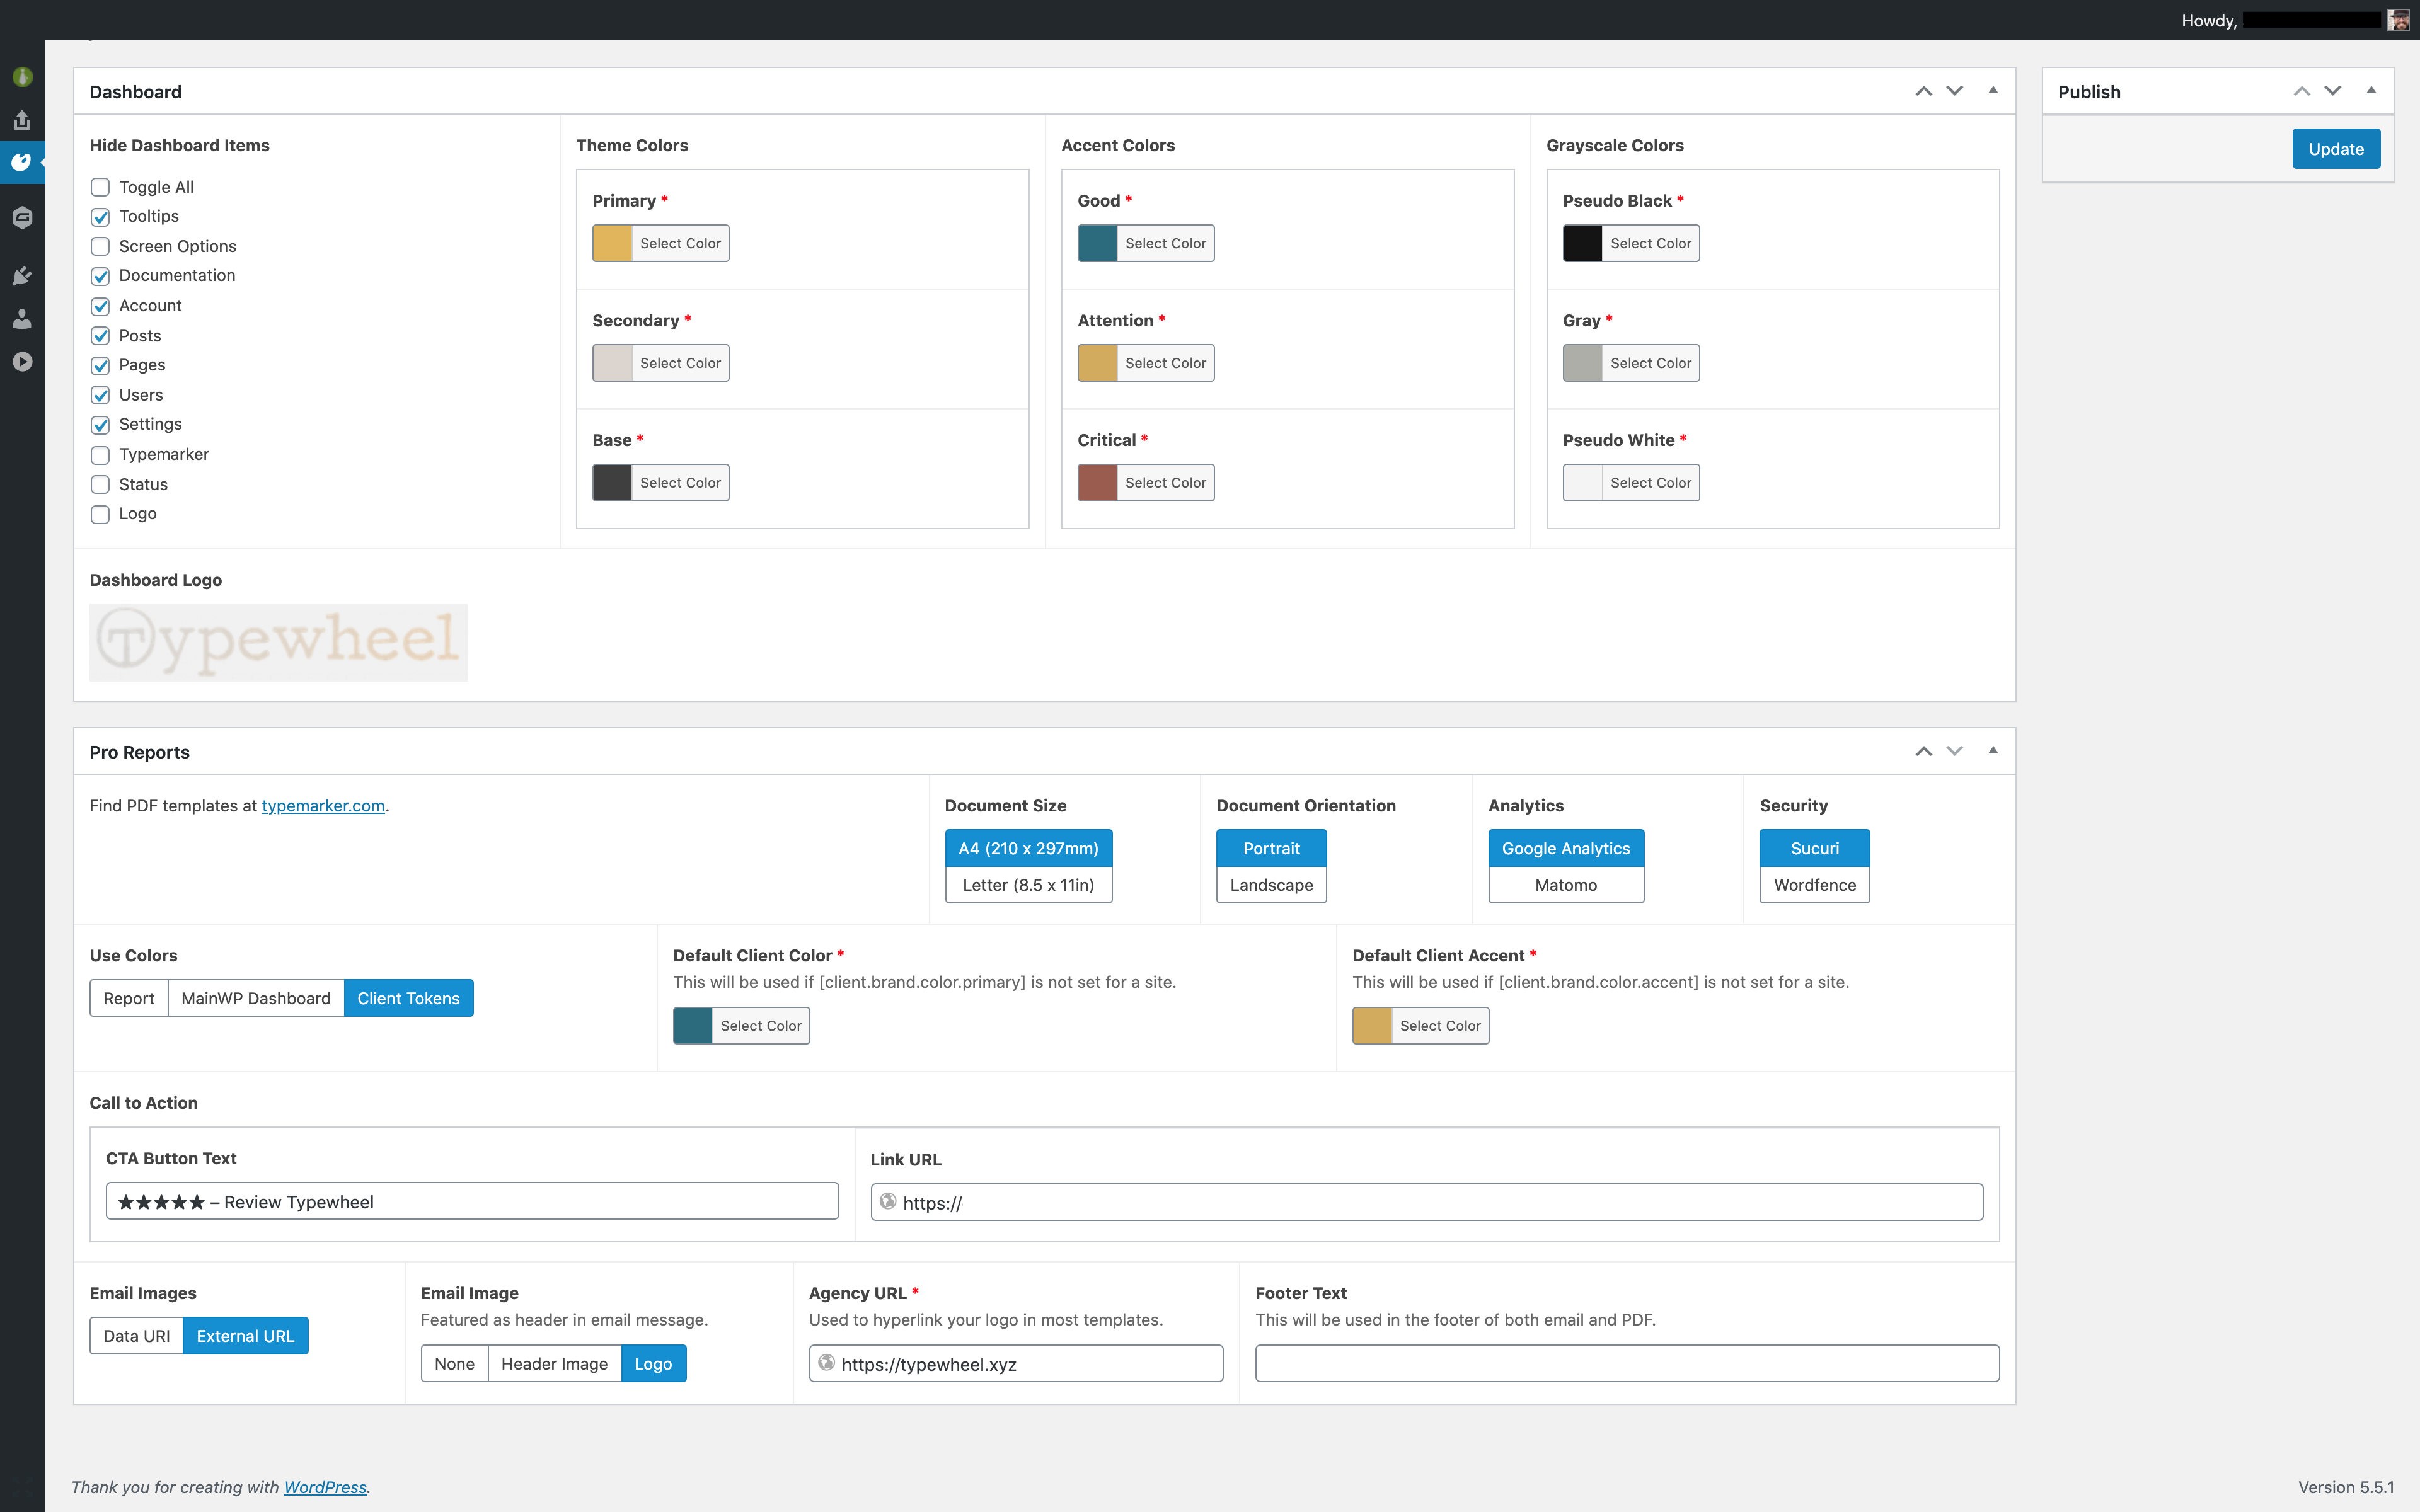
Customization
Now that you have both the plugin and template installed, you can set up specific customizations for your dashboard. A link to Typemarker settings can be found both in the WP admin menu and in the MainWP admin menu. This settings page includes fields for customizing both your dashboard and your pro reports. An informal video walk-through of these specific settings can be seen here.
Looking for better management of report tokens for your sites? Check out the Token Importer.
Currently 40% OFF
Currently 40% OFF